
In November 2018, Amazon released toolkits for the IntelliJ software suite (including PyCharm) to communicate directly with AWS. This enables you for instance to create a new, ready-to-deploy serverless application in your preferred runtime (e.g. Python), and locally test it directly from within PyCharm, before deploying it to AWS Lambda. In this post, I will provide instructions for the setup and configuration of PyCharm and your local development environment, and how you can go ahead and deploy your first Python serverless function directly to AWS Lambda.
We'll use:
- Python 3.6 and PyCharm as an IDE
- AWS Lambda to deploy your serverless functions
- AWS CloudFormation, for instance to automatically configure Amazon API Gateway routes for your function
- Docker, required for locally testing your lambda functions
Preliminary Setup: Local Environment
It's instrumental that your local development environment matches the Python version for deployment (and also, to interact with AWS from within PyCharm via the AWS toolkit). I’m using Python 3.6. I was not able to get this running on Python 3.7 at the time of writing, and I had to downgrade to Python 3.6. Therefore, make sure you’re running Python 3.6. I can recommend using Pyenv for simple local Python version management.
First, confirm your python version with the following command:
python -V
# Python 3.6.5
Now, you’re all set, and you will be able to follow the next steps without running into Python-related compatibility issues.
Preliminary Setup: Installing aws-sam-cli
Install the AWS Serverless Application Model (SAM) command line interface using brew (see here for more instructions):
brew upgrade
brew update
brew tap aws/tap
brew install aws-sam-cli
You should be able to run sam from the command line as such:
sam --version
Then, install docker (which is required for locally testing your lambda functions). I suggest installing Docker Desktop:
brew cask install docker
open /Applications/Docker.app
As soon as docker has been launched, check if it is running:
docker ps
AWS Toolkit Installation and Project Setup
In order to install the AWS Toolkit for PyCharm, you need to go through the following steps:
- Go to
Settings > Pluginsand search for „AWS Toolkit“ - Install the plugin
- Restart PyCharm to make sure the plugin is accessible from within the IDE
Then, set up your project in PyCharm. Create a new project from File > Create new project and choose AWS Serverless Application as project type. Be sure to select the correct setting (you can choose a „Hello World“ template from More Settings > SAM Template).
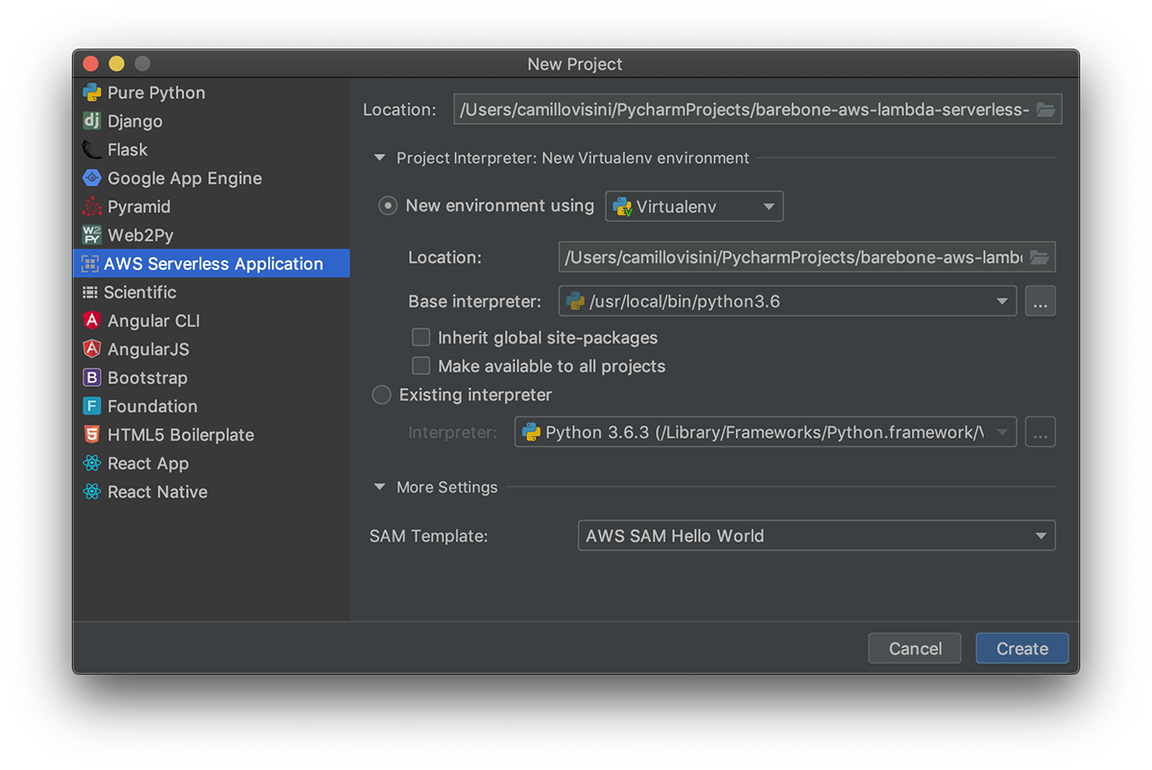
Your project will be set up for you automatically, and a function called lambda_handler, which returns a basic „Hello World“ example, will be created in app.py.
Testing Functions Locally
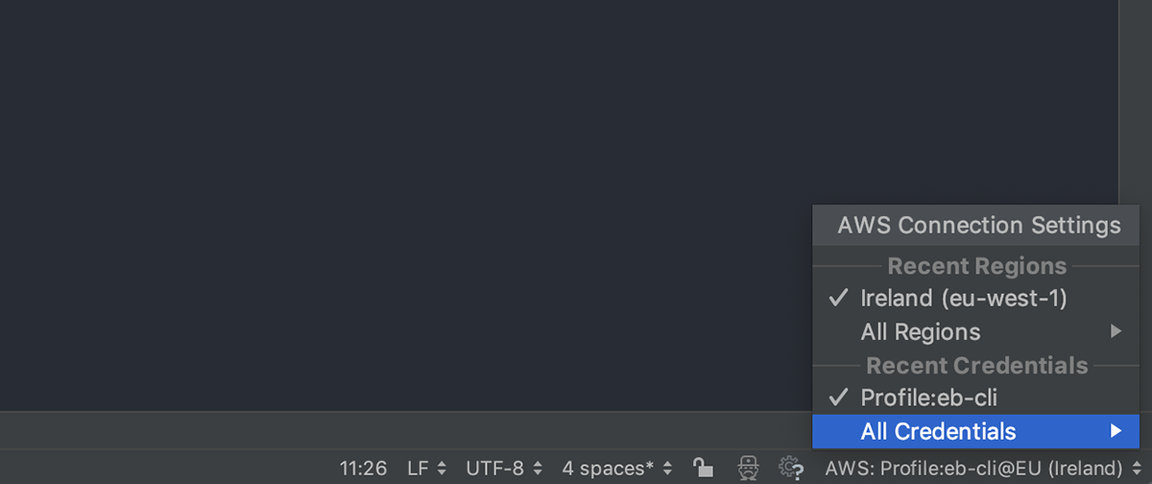
First, you need to configure the AWS Toolkit with your preferred region and credentials. You can access the menu from the bottom right corner of the IDE window:
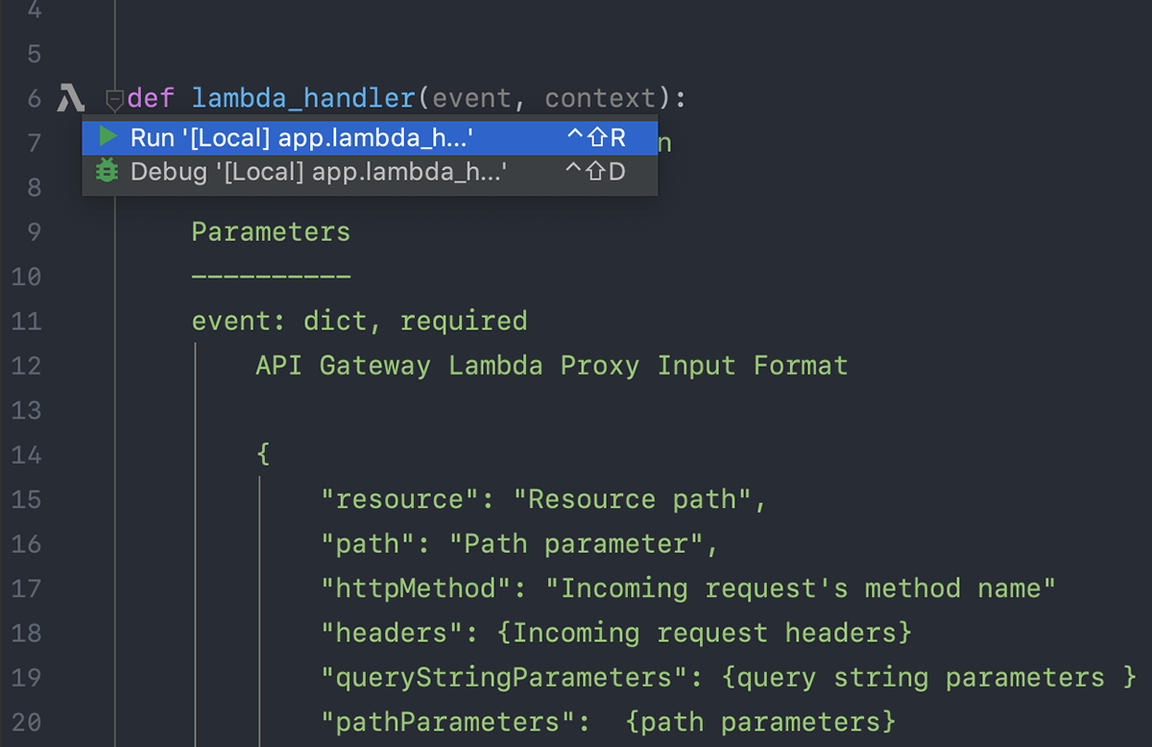
As soon as you have configured this, you can go ahead and set up your run configurations for testing your function locally by navigating to Run > Edit Configurations and selecting from the left sidebar Templates > AWS Lambda > Local. Leave the settings on their respective default values (Runtime=Python 3.6 and Handler=app.lambda_handler), and confirm by clicking on OK. You can now go ahead and run the function locally by navigating to Run > Run. Alternatively, you can invoke the function locally by clicking on the AWS symbol next to your function statement:
Note: When you attempt running your newly created Lambda function for the first time, the lambci/lambda:python3.6 Docker container image will be downloaded and installed. This takes several minutes. Upon successfully invoking the function locally, you can go ahead and check the response in the PyCharm console.
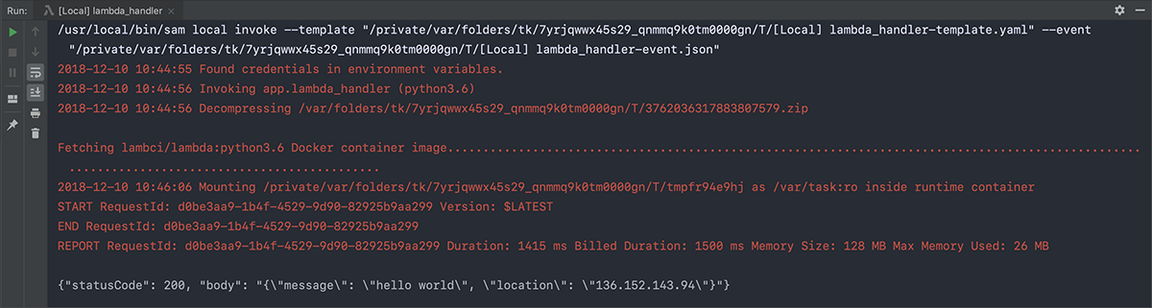
As you can see, the function was invoked successfully, as we received the following response:
{
  "statusCode": 200,
  "body": {
    "message": "hello world",
    "location": "136.152.143.94"
  }
}
You're now able to debug and test your function directly from within PyCharm, significantly speeding up your workflow! Now, let's find out how to deploy the function to AWS Lambda.
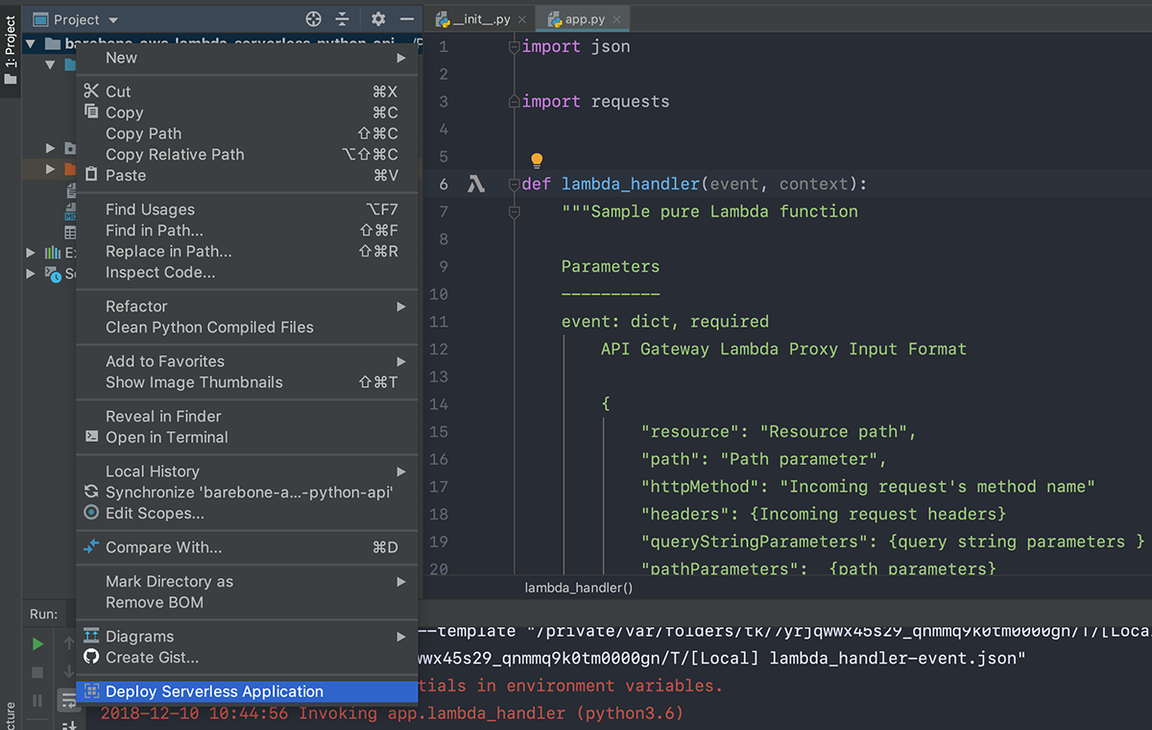
Deploying Functions to AWS Lambda
In order to deploy your function to AWS Lambda, you can right-click on your project folder in the sidebar, and choose Deploy Serverless Application:
You’ll need to create a AWS CloudFormation stack and Amazon S3 Bucket (if needed) in order to proceed with the deployment. After deploying, AWS CloudFormation will automatically create an API Gateway and point it to your AWS Lambda function, exposing it to the public. Therefore, you can retrieve the API Gateway URL from your AWS console, and try the live deployment of your function, e.g. via your browser.
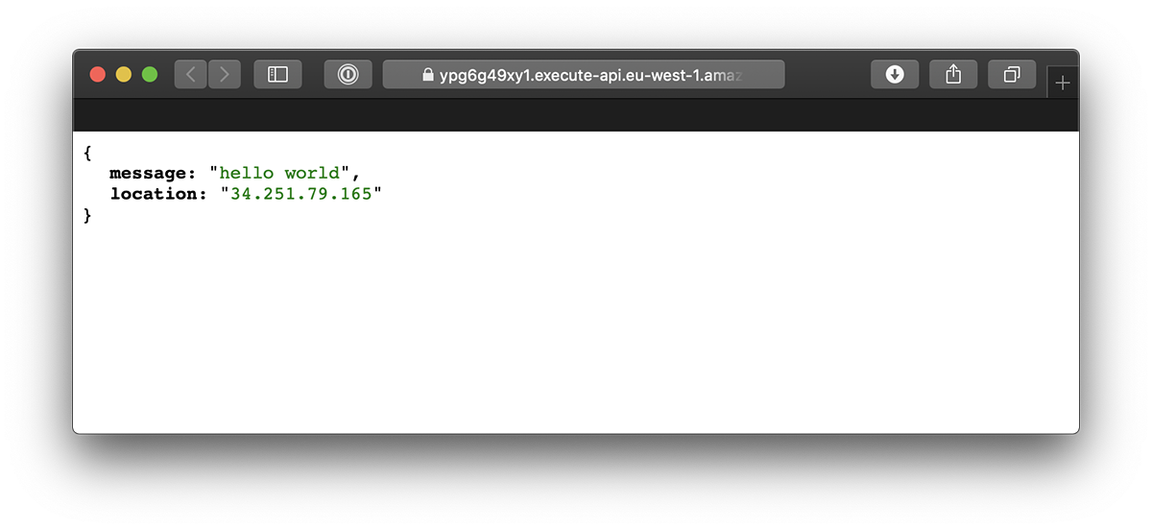
Alternatively, you can use an API development tool, for instance, Postman or Paw, in order to test your function.
Conclusion
Congratulations! You’ve now successfully set up PyCharm with AWS toolkit to test your functions locally (via Docker), and subsequently deploy it live to AWS Lambda (via AWS CloudFormation) and expose it to the public (via Amazon API Gateway).
I hope you enjoyed this article — please let me know if you have any questions or if you run into any issues.
