From GUI to CLI: A Better Synology Downloader
Creating a secure, testable CLI for Synology NAS downloads using Ruby, Thor and 1Password
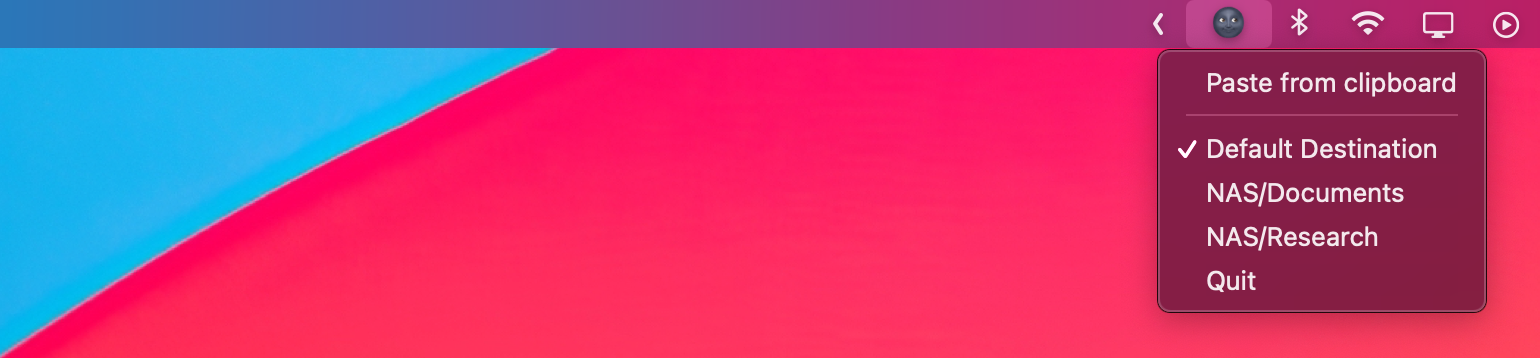
A couple of years ago, I created Synology DL, a macOS menubar app that lets you paste magnet links to download files directly to your Synology NAS, using Synology’s Download Station. This helped me to quickly start downloads directly from the menubar, without needing to log into the NAS web interface. It looks like this:
That version was built during a phase when I was creating other menubar apps. It’s written in Python, packaged with py2app, and it worked fine for years. But as I recently hardened my NAS setup (adding Tailscale, setting up SSL certificates, and most importantly, enabling 2FA via OTP), it broke down along the way. It couldn’t handle the new authentication flow, and I didn’t want to maintain a GUI app with all its complexities. Also, the Python packaging was brittle and I ran into some issues with py2app (for example module collisions).
Time to take another stab at it. I decided to rewrite it: This time as a command-line tool, using Ruby and a simpler, testable setup. I integrated 1Password to store credentials, since I store all my passwords there. The new version should also adhere to secure practices when communicating with the Synology API. The result is a new CLI tool called sdls.
This post will walk you through the process of building sdls. Let’s see how I built it and what I learned along the way.
Project Setup
I started with a simple Ruby project structure.
- I used Thor for command-line parsing and help generation
- I added tty-prompt for user input
- I’m relying on the 1Password CLI (for credentials and OTP handling)
The new tool has these key features:
- Add magnet links to Synology Download Station
- Securely authenticate via 1Password CLI (including OTP)
- Alternatively authenticate via username/password in configuration file
- Access magnet links from the clipboard
- Prompt for download directories and select them interactively
You can configure it via a YAML file, which makes it easy to set up and use. Here’s an example config file (place it in ~/.config/sdls.yml or set the SDLS_CONFIG_PATH environment variable to adjust the path):
host: http://nas.local:5000
username: my_user
password: my_pass
op_item_name: My1PasswordItem
directories:
  - NAS/Research
  - NAS/Downloads
  - NAS/Archive
If you use 1Password for authentication, you can leave out the username and password fields. The op_item_name is the name of the 1Password item that contains your Synology credentials (username and password, as well as the OTP):
host: http://nas.local:5000
op_item_name: My1PasswordItem
directories:
  - NAS/Research
  - NAS/Downloads
  - NAS/Archive
Functionality
You can check the loaded configuration with the sdls config command, which will output the current settings. For example:
$ sdls config
Current config:
  host: http://nas.local:5000
  op_item_name: My1PasswordItem
  directories: NAS/Research, NAS/Downloads, NAS/Archive
To check if you can connect to your Synology NAS, use the sdls connect command:
$ sdls connect
Authenticating with Synology API...
OTP required for authentication. Fetching from 1Password...
Connection successful. Session ID: abc-def-123...
Finally, to add a magnet link, use the sdls add <magnet> command:
$ sdls add "magnet:?xt=urn:btih:1234567890&dn=example-file"
Choose download directory (Press ↑/↓ arrow to move and Enter to select)
‣ NAS/Research
‣ NAS/Downloads (selected)
‣ NAS/Archive
OTP required for authentication. Fetching from 1Password...
Download created successfully in NAS/Downloads
If you don’t provide a magnet link, it will try to read it from your clipboard. Just run sdls add without any arguments:
$ sdls add
Reading magnet link from clipboard...
Choose download directory (Press ↑/↓ arrow to move and Enter to select)
‣ NAS/Research (selected)
‣ NAS/Downloads
‣ NAS/Archive
OTP required for authentication. Fetching from 1Password...
Download created successfully in NAS/Research
Authentication via 1Password
Authentication is handled via Synology’s Web API. If the server responds with an OTP requirement, sdls will automatically try to fetch the code using the 1Password CLI. It looks for an item with the name specified in the configuration file (op_item_name) and retrieves the OTP code from that item. Here’s how it works internally:
op item get "My1PasswordItem" --otpIf the call fails or the OTP is wrong, it will tell you and prompt you to enter the OTP manually.
Note: Currently, if your Synology NAS has 2FA enabled, sdls requires you to have the 1Password CLI installed and 2FA configured within your credentials item. In the future, I might add support for other OTP providers, but for now, 1Password works great for me.
Testing the CLI
Testing a CLI tool can be tricky, but thanks to Ruby’s testing ecosystem, it’s straightforward. We can use the tools we already know. I chose to use:
minitestas the testing frameworkwebmockto simulate API responsescapture_ioto test CLI output- Mocked
TTY::Promptto simulate user input viaMinitest::Mock
Especially useful is the capture_io method provided by Minitest::Assertions, which allows you to capture standard output and standard error. We can use it like this:
stdout, stderr = capture_io do
  puts "Some output"
  warn "Some warning"
end
For usage with Thor commands, the capture_io method can be used to capture the output of your CLI commands. Here’s an example of how to test the sdls add command:
def test_add_command
  magnet_link = "magnet:?xt=urn:btih:1234567890&dn=example-file"

  stdout, stderr = capture_io do
    SDLS::CLI.start(["add", magnet_link])
  end

  assert_match(/Adding magnet link: #{magnet_link}/, stdout.strip)
  assert_empty(stderr.strip)
end
We can also assert errors are raised when invalid input is provided. For example, if the user tries to add a magnet link that is not valid, we can test that we see the SystemExit being raised, and the CLI responding appropriately:
def test_add_failure_invalid_magnet_link
  invalid_link = "http://example.com/not-a-magnet"

  stdout, stderr = capture_io do
    assert_raises SystemExit do
      SDLS::CLI.start(["add", invalid_link])
    end
  end

  assert_match(/Invalid magnet link./, stderr.strip)
end
Mocking User Input with Minitest
Mocking helps us simulate user input for our CLI. For example, if we want to test the directory selection prompt, we can mock TTY::Prompt to return a specific directory.
Since we use Minitest, we can use Minitest::Mock to set up and work with mocks. First we have to create a mock:
mock_prompt = Minitest::Mock.newThen we can tell it to return a specific directory when the select method is called:
mock_prompt.expect(:select, "NAS/01_documents", [
  "Choose download directory",
  ["NAS/01_documents", "NAS/02_archive"]
], default: "NAS/01_documents")
The above part sets up an expectation: The test expects that the select method will be called on the mock, with exactly those arguments. When that happens, it should return NAS/01_documents, simulating a user picking that option. But why are the arguments passed like that?
Because in the implementation the call to select actually looks like this:
prompt.select("Choose download directory",
  ["NAS/01_documents", "NAS/02_archive"],
  default: "NAS/01_documents"
)
It’s important to know that Minitest::Mock expects keyword arguments to be passed separately from positional arguments. For that reason, the last part (default: "NAS/01_documents") is passed outside the array. See the method signature of Minitest::Mock#expect, which looks like this:
def expect(name, retval, args = [], **kwargs, &blk)To use the mock in our test, we wrap the CLI call in a block that stubs TTY::Prompt.new to return our mock. This way, when the CLI code calls TTY::Prompt.new, it will receive our mock instead of the real prompt object.
TTY::Prompt.stub :new, mock_prompt do
  SDLS::CLI.start(["add", magnet_link])
end
Finally, we can verify that the mock was called as expected:
mock_prompt.verifyNow, the test will only pass if the CLI code calls select exactly as expected, and returns what we told it to. If the CLI changes its prompt call in any way, the test will fail and alert us.
Why Ruby?
I think Ruby is a great fit for CLI tools. It’s expressive, readable, and comes with powerful libraries like Thor for building CLI apps. Minitest makes testing very enjoyable. The developer experience is fast and fun. Writing the CLI in Ruby let me focus on the logic without boilerplate. Therefore, why not Ruby?
Conclusion
What started as a GUI app evolved into a CLI tool. I think it’s a much better choice for this task. The new sdls CLI is:
- Easier to maintain in case of changes to the Synology API
- More secure (1Password integration)
- Fully testable with unit tests
- Fast and simple to use
If you’ve got a Synology NAS and want a scriptable way to start download tasks, give it a try! Currently, you can get it via RubyGems:
gem install sdlsThe full source code is available on GitHub, if you’re interested in contributing or just want to check it out.
I hope this is helpful for those looking into building their own testable CLI tools with Ruby. If you have any questions or suggestions, feel free to reach out. I’m always happy to discuss!